Credits for Halil Bahar for his awesome quarkus-angular-keycloak lecture
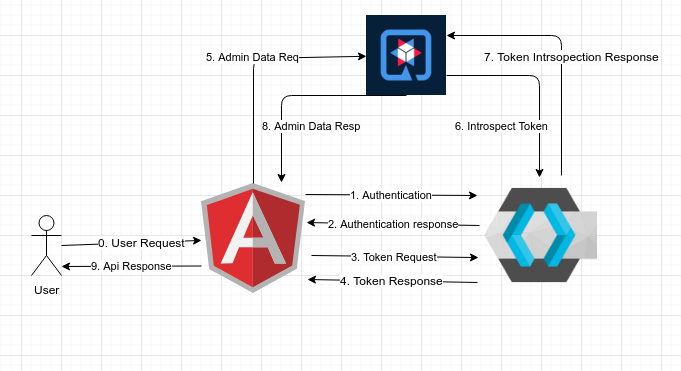
1. Concept
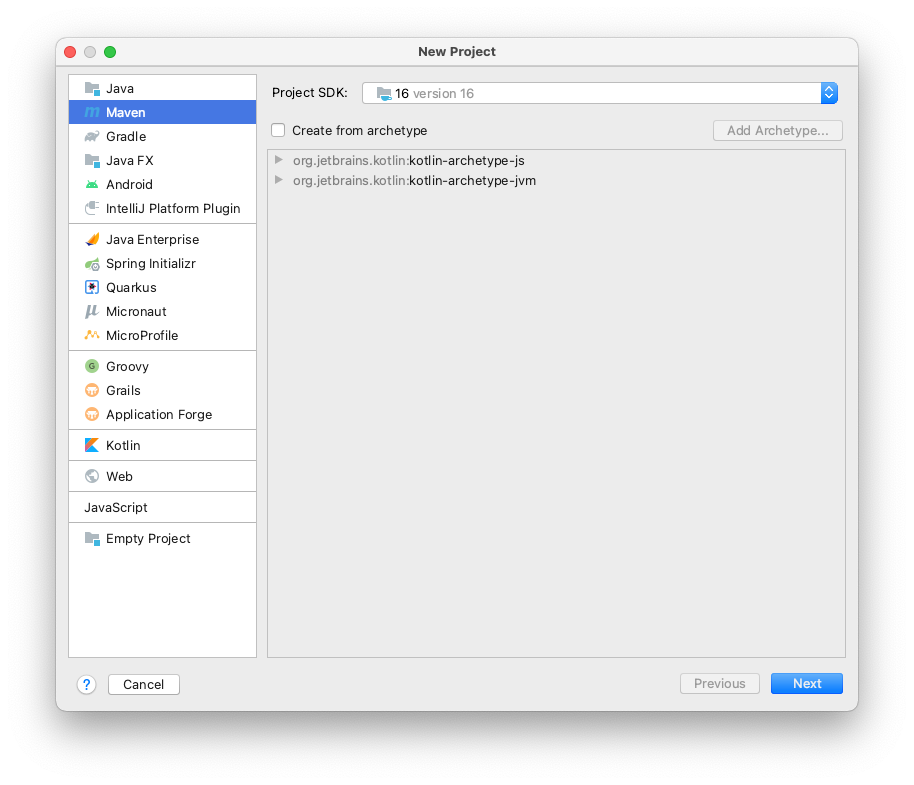
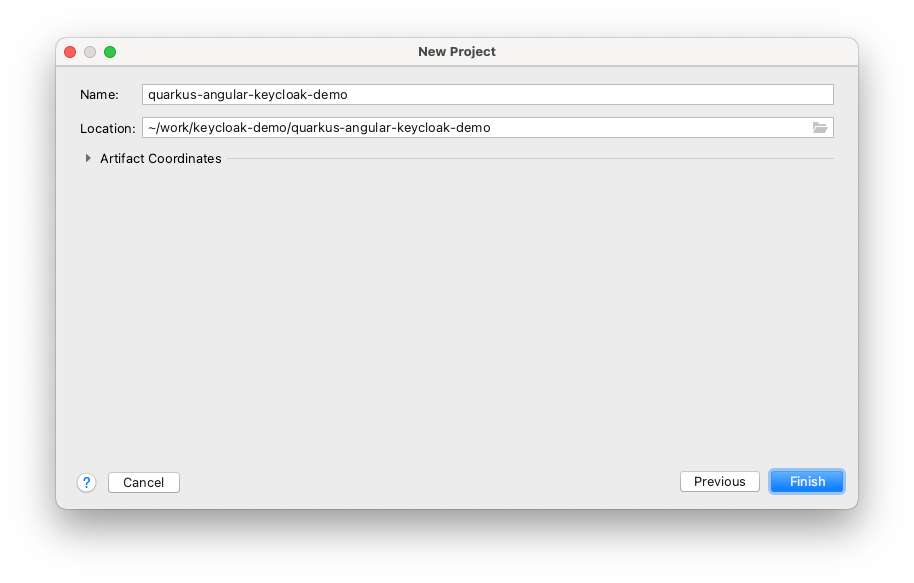
2. Create Quarkus Project
mkdir keycloak-demo
cd keycloak-demo
Create a simple maven project:
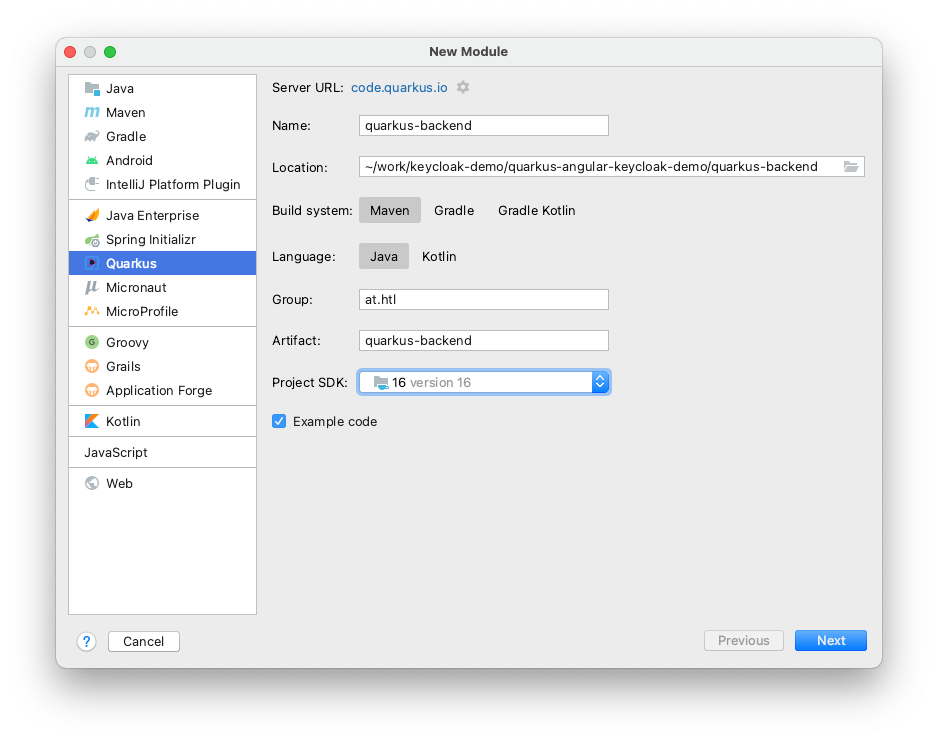
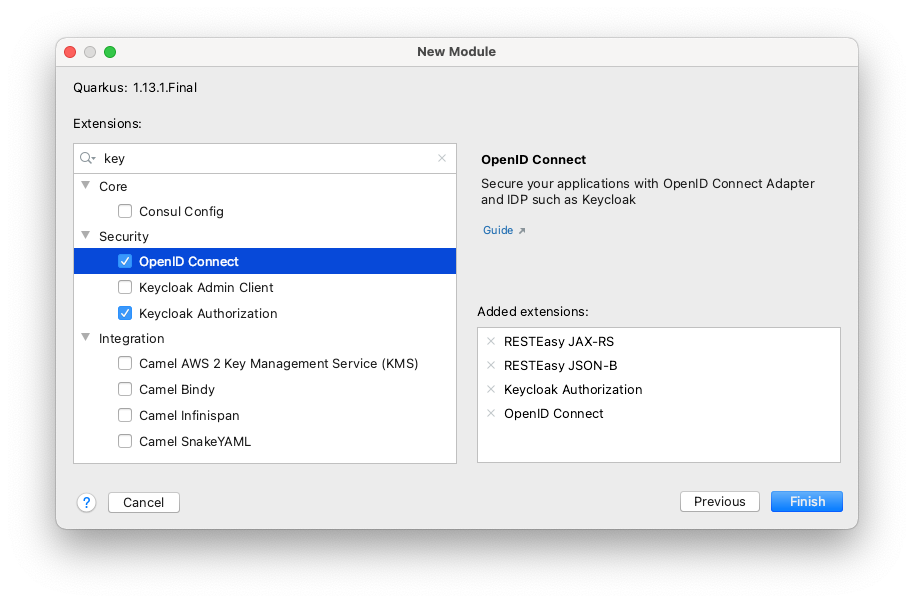
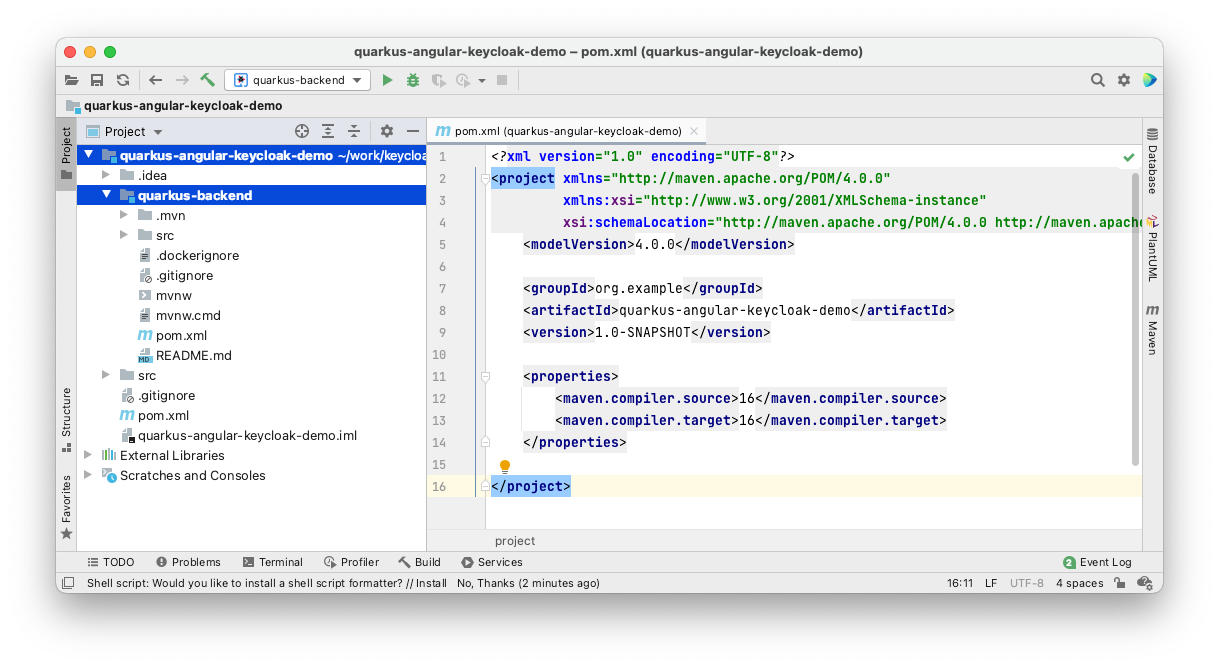
Create a new module:
@Path("/hello")
public class ExampleResource {

    @GET
    @Produces(MediaType.TEXT_PLAIN)
    public String hello() {
        return "Hello from Server";
    }
}cd quarkus-backend
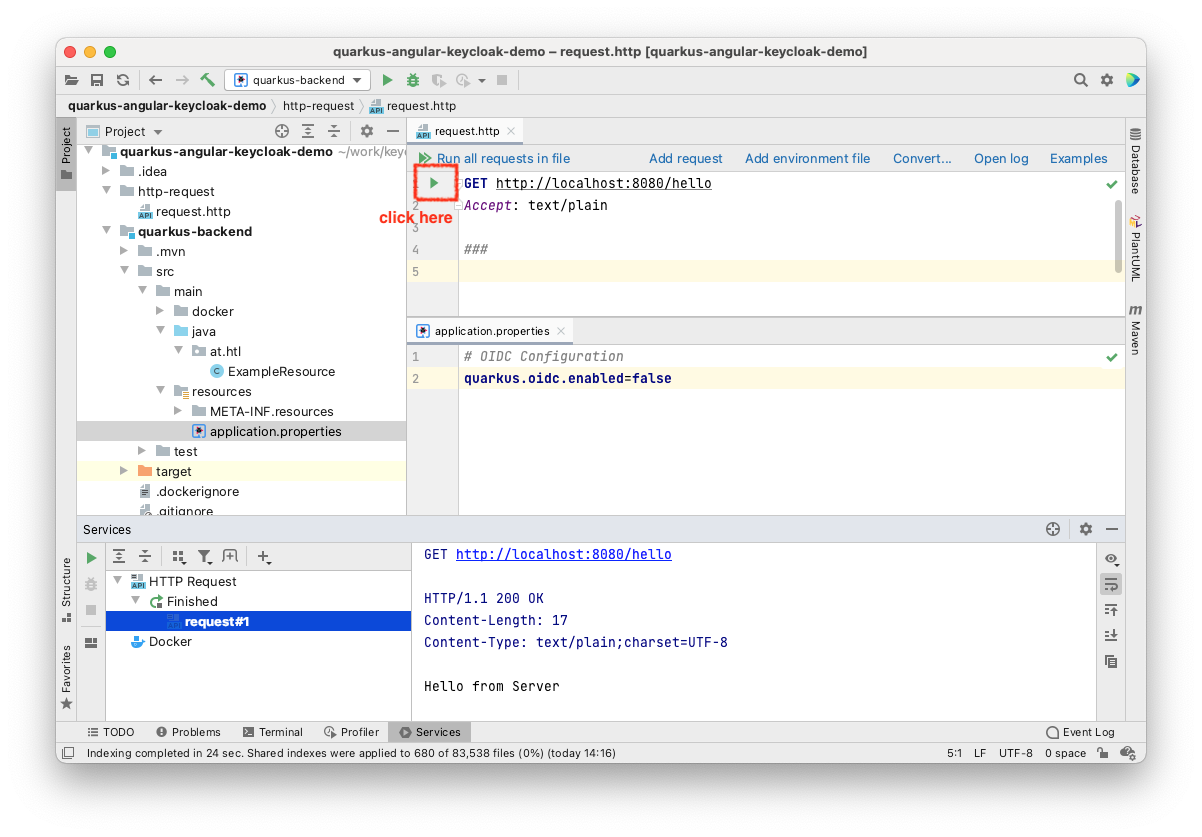
./mvnw clean compile quarkus:dev3. Access to the Unprotected Endpoint
5. Configure Keycloak
5.1. Run Keycloak-Docker-Container
docker run --rm -p 8180:8080 -e KEYCLOAK_USER=admin -e KEYCLOAK_PASSWORD=admin jboss/keycloak:15.0.2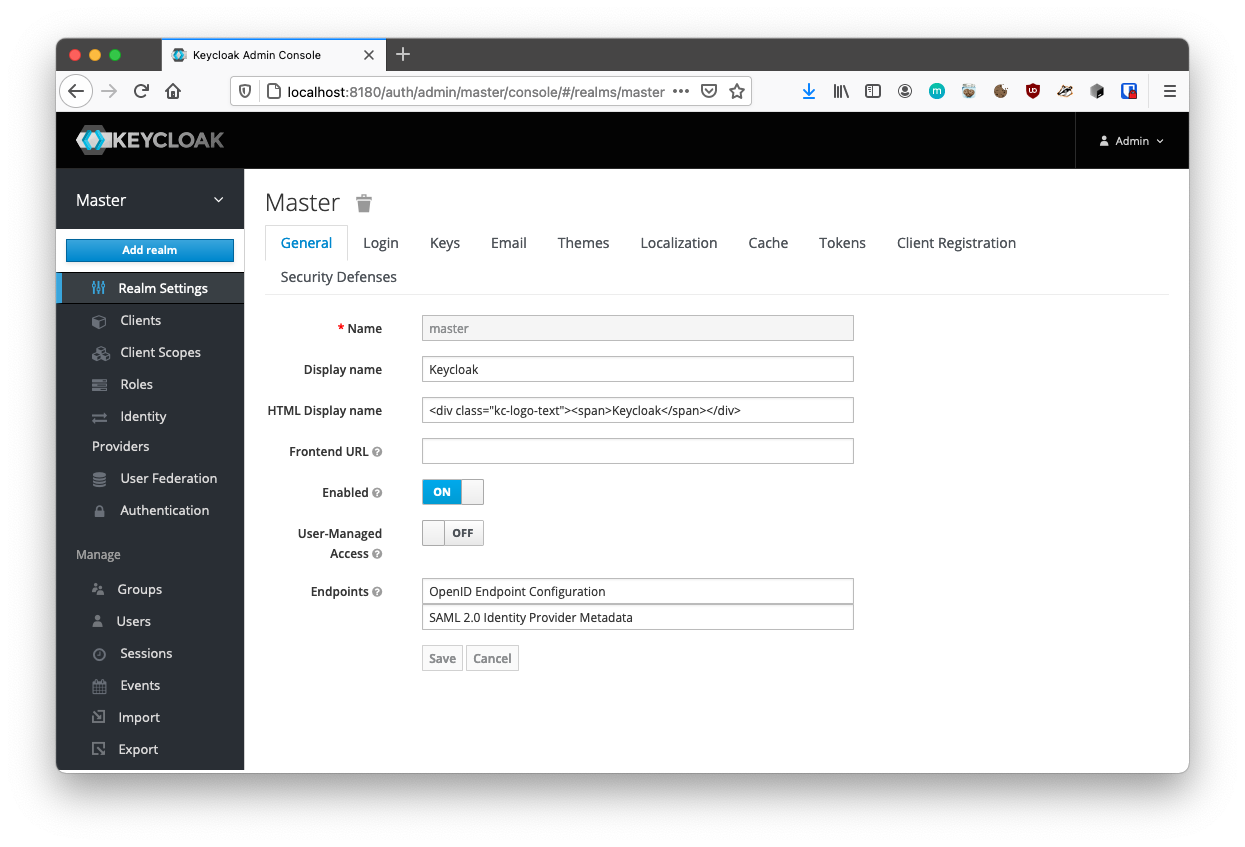
5.4. Add Client
-
Clients
-
Create
-
ClientID: demo
-
Client Protocol: openid-connect
-
Advanced Settings
-
Access Token Lifespan: ???
-
Client Session Idle: ???
-
-
Click Save
-
-
-
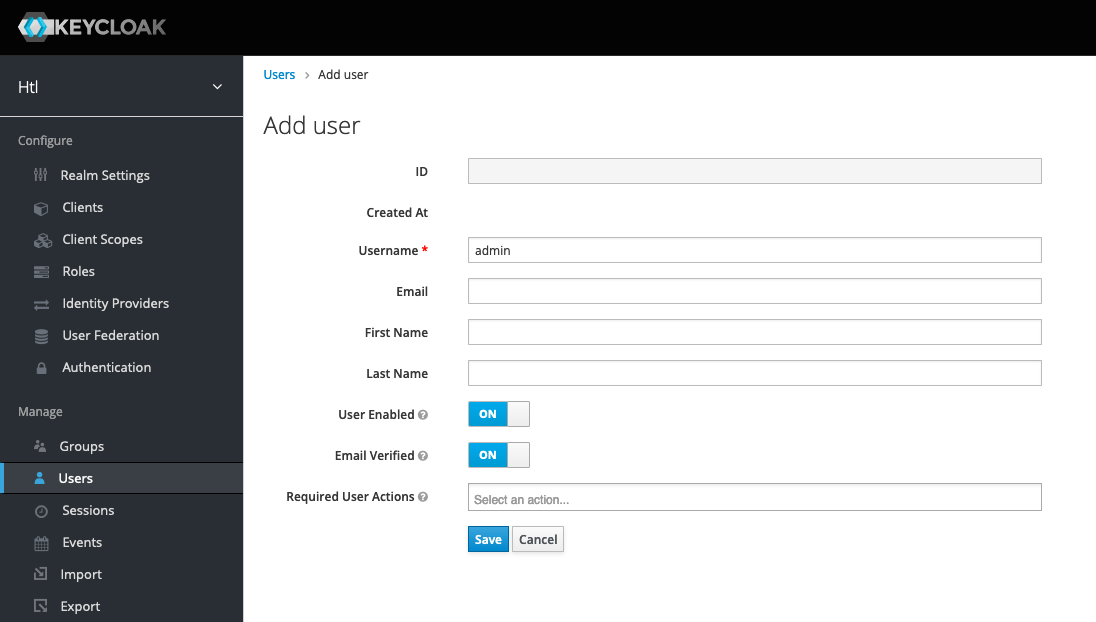
Users
-
Add user
-
Details
-
Username: admin
-
Email Verified: ON
-
Save
-
-
-
Add user
-
Credentials
-
Password: passme
-
Password Confirmation: passme
-
Temporary: OFF
-
Set Password
-
Are you sure you want to set a password for the user?: Set password
-
-
Clients → demo
-
Settings
-
Access Type: bearer-only
-
Service Accounts Enabled: ON
-
Authorization Enabled: OFF
-
Valid Redirect URIs: http://localhost:8080/
-
Save
-
-
Credentials
-
Copy Secret into clipboard
-
Paste the secret in application.properties in the line "quarkus.oidc.credentials.secret"
-
-
|
Bearer tokens allow requests to authenticate using an access key, such as a JSON Web Token (JWT). The token is a text string, included in the request header. Bearer authentication (also called token authentication) is an HTTP authentication scheme that involves security tokens called bearer tokens. The name “Bearer authentication” can be understood as “give access to the bearer of this token.” The bearer token is a cryptic string, usually generated by the server in response to a login request. The client must send this token in the Authorization header when making requests to protected resources |
7. Sources
-
YouTube: Microprofile Rest Client with TLS Authentication | Quarkus Tutorial | QUARKUS | TLS
-
Anthony Ikeda - Securing Angular and Quarkus with Keycloak Pt 1
-
https://www.keycloak.org/docs/latest/server_admin/#oidc-clients
-
https://dev.to/anthonyikeda/securing-angular-and-quarkus-with-keycloak-pt-1-4g33
-
https://dev.to/anthonyikeda/securing-angular-and-quarkus-with-keycloak-pt-2-43bh
-
https://github.com/ErikMayrhofer/angular-quarkus-keycloak-example
-
mit auth interceptor
-