Credits to Mr. Christian Aberger - this notes are based on his lecture @ HTL Leonding

2. Create ssh-key-pair
github_key# log in @ remote server ssh oravm cd .ssh ssh-keygen -t rsa
Generating public/private rsa key pair.
Enter file in which to save the key (/home/ubuntu/.ssh/id_rsa): github_key
Enter passphrase (empty for no passphrase):
Enter same passphrase again:
Your identification has been saved in github_key
Your public key has been saved in github_key.pub
The key fingerprint is:
SHA256:MftyaebNas9z9hSiED2GeJcUDD8IUbhRytRGJTkldJk ubuntu@instance-20210316-1435
The key's randomart image is:
+---[RSA 3072]----+
|        .O%==o   |
|       .+==OE    |
|      . *+B=.    |
|       ..B.oo    |
|        S   ...  |
|         o o . . |
|        . B   .  |
|         *.++.   |
|         .o+=+.  |
+----[SHA256]-----+
ubuntu@instance-20210316-1435:~/.ssh$ ls -l
total 12
-rw------- 1 ubuntu ubuntu  580 Mar 16 13:37 authorized_keys
-rw------- 1 ubuntu ubuntu 2622 Mar 17 10:41 github_key
-rw-r--r-- 1 ubuntu ubuntu  583 Mar 17 10:41 github_key.pub
3. Add the public key to authorized_keys
cat ~/.ssh/github_key.pub >> ~/.ssh/authorized_keys
cat ~/.ssh/authorized_keys
ssh-rsa AAAAB3NzaC1yc2EAAAADAQABAAABgQCubid/1JXXwvLZvrq7nZJ/qkGqG0lIShEhmazwOmNk5WWUJ9hIO1oScbcxxrxAPKeWvngE2P0RvMs8FdWZwKzph2Om0/XTHb/oldm+4griKDkVdy0zuv5wOvyGaNef9e3XbxK5dBvR1HA4ZoGEQAMXyIf4BtRjV725xzoZMIolk= stuetz@Toms-MBP-2020.local
ssh-rsa AAAAB3NzaC1yc2EAAAADAQABAAABgQDxERIDOGyZeg9YUb2Xd7fir2xDd73zZnvdq0THqxcOExp6zsRhEjsvJD3l89wwc7ySfgCn/3BKy6vvP8Ommc9i3U2Of6XuiyfOn0i8POE2Dy8TUSm3utjphof7BTagko8+sb1YXPUPj2wUBGICVSgnEy5B4WdvG4HlLLJ+LEWgz0= ubuntu@instance-20210316-1435
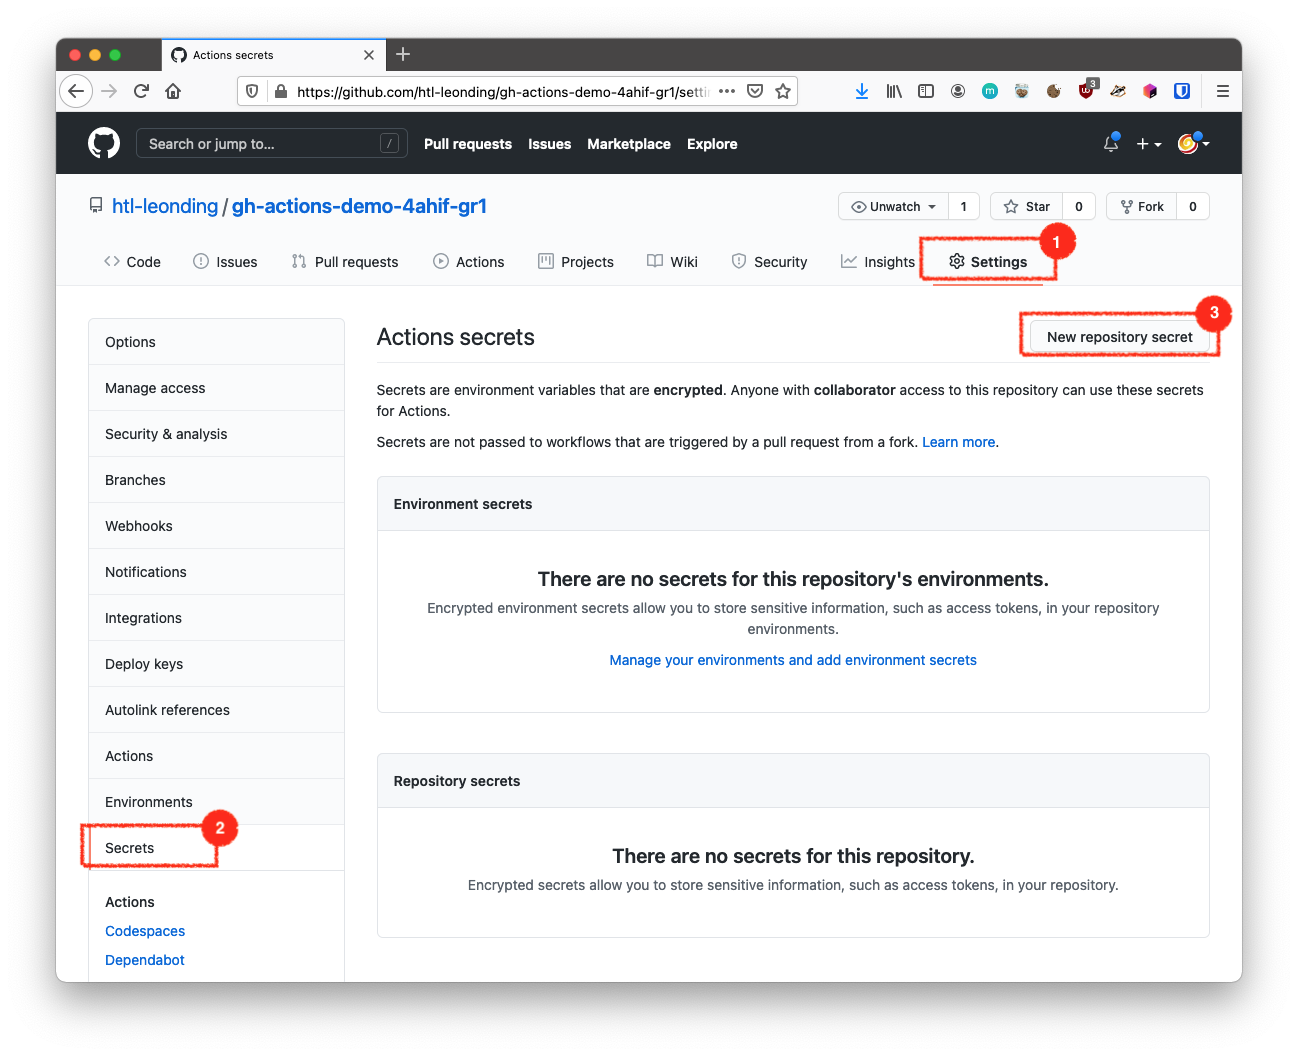
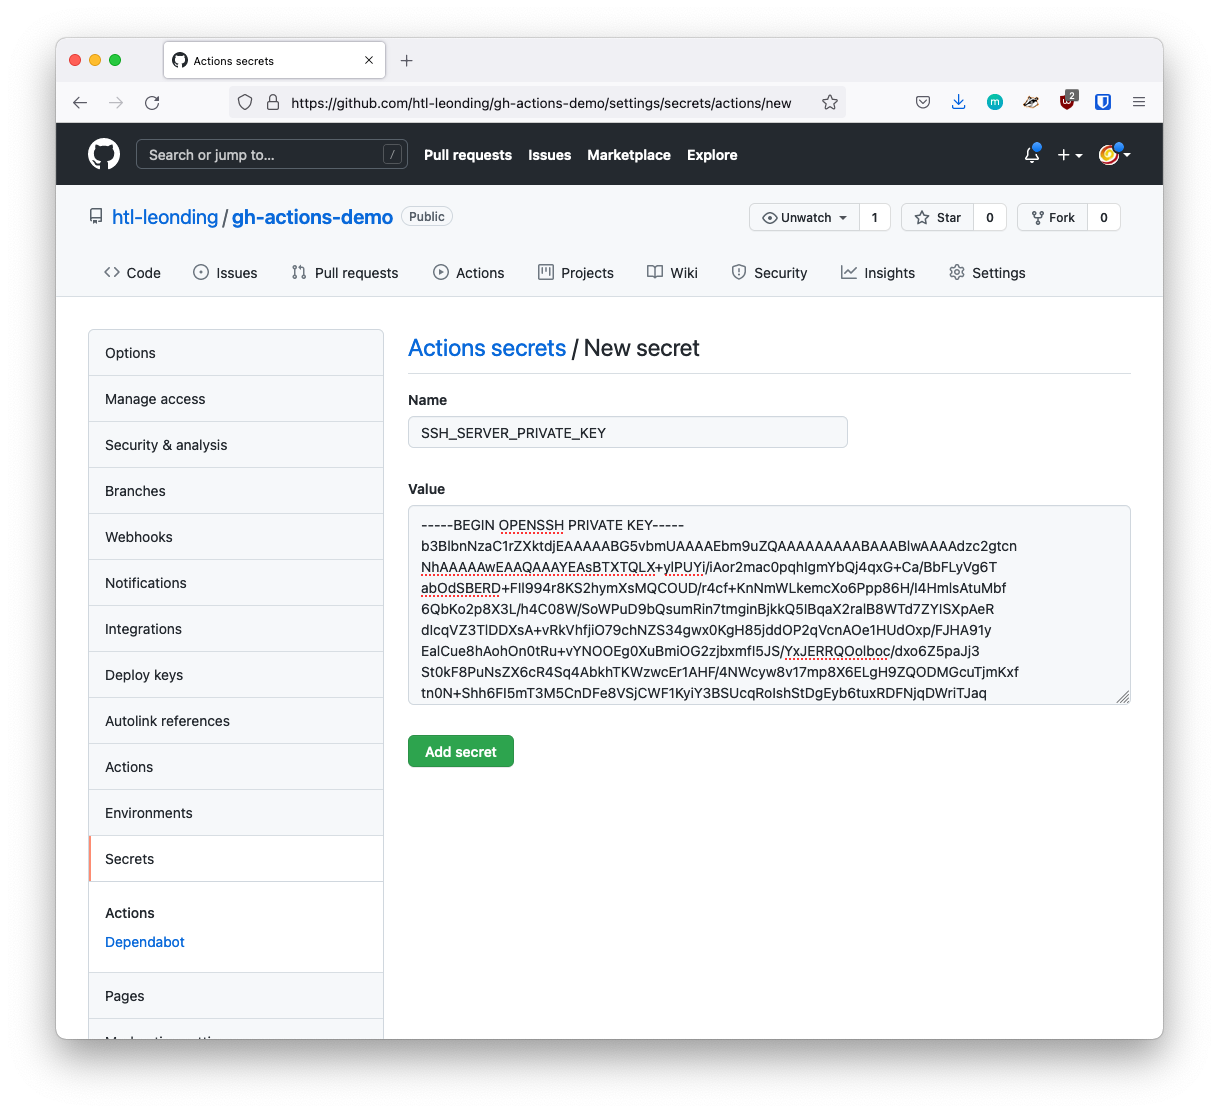
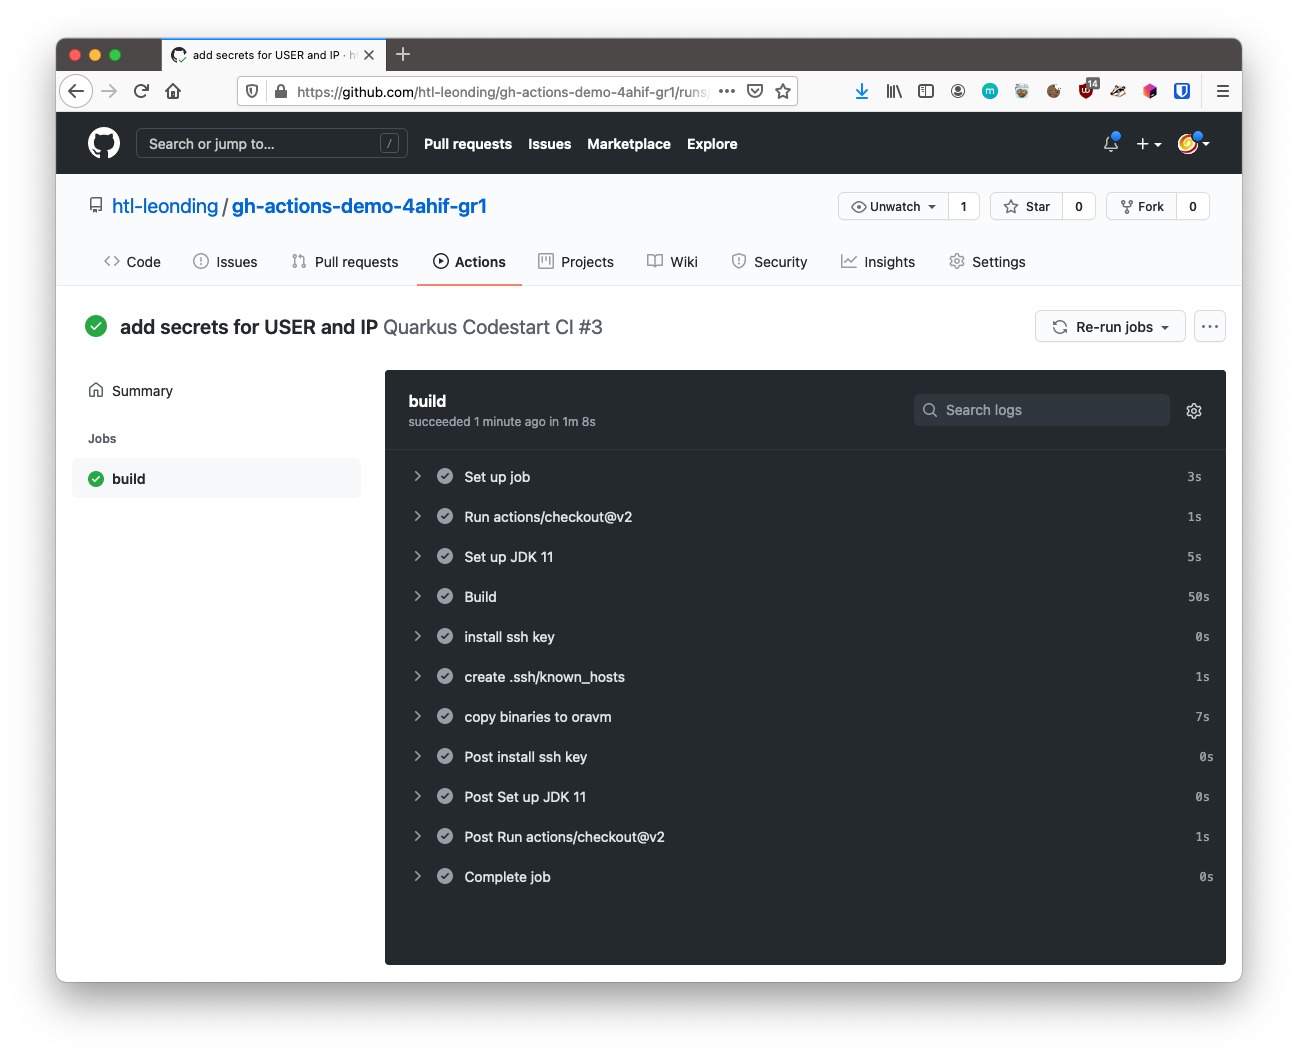
4. Create a Secret in the gh-repo
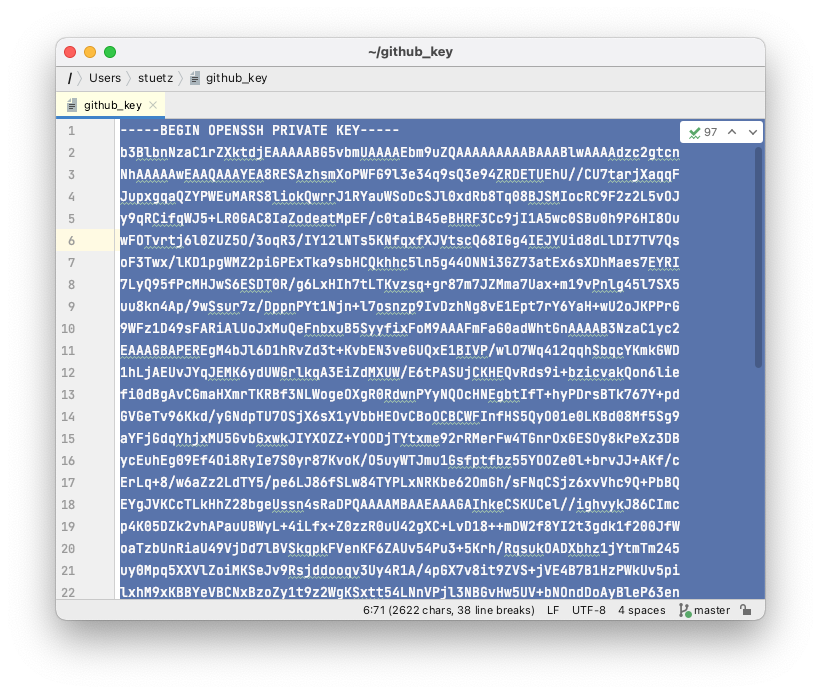
4.1. Copy the key-pair to your Local Machine
scp oravm:.ssh/github_key ~
github_key 100% 2622 47.6KB/s 00:00
scp oravm:.ssh/github_key.pub ~
github_key.pub 100% 583 9.5KB/s 00:00
-rw-------    1 stuetz  staff   2.6K Mar 17 11:47 github_key
-rw-r--r--    1 stuetz  staff   583B Mar 17 11:47 github_key.pub
Further informations: How to Use SCP Command to Securely Transfer Files
5. Status Quo
-
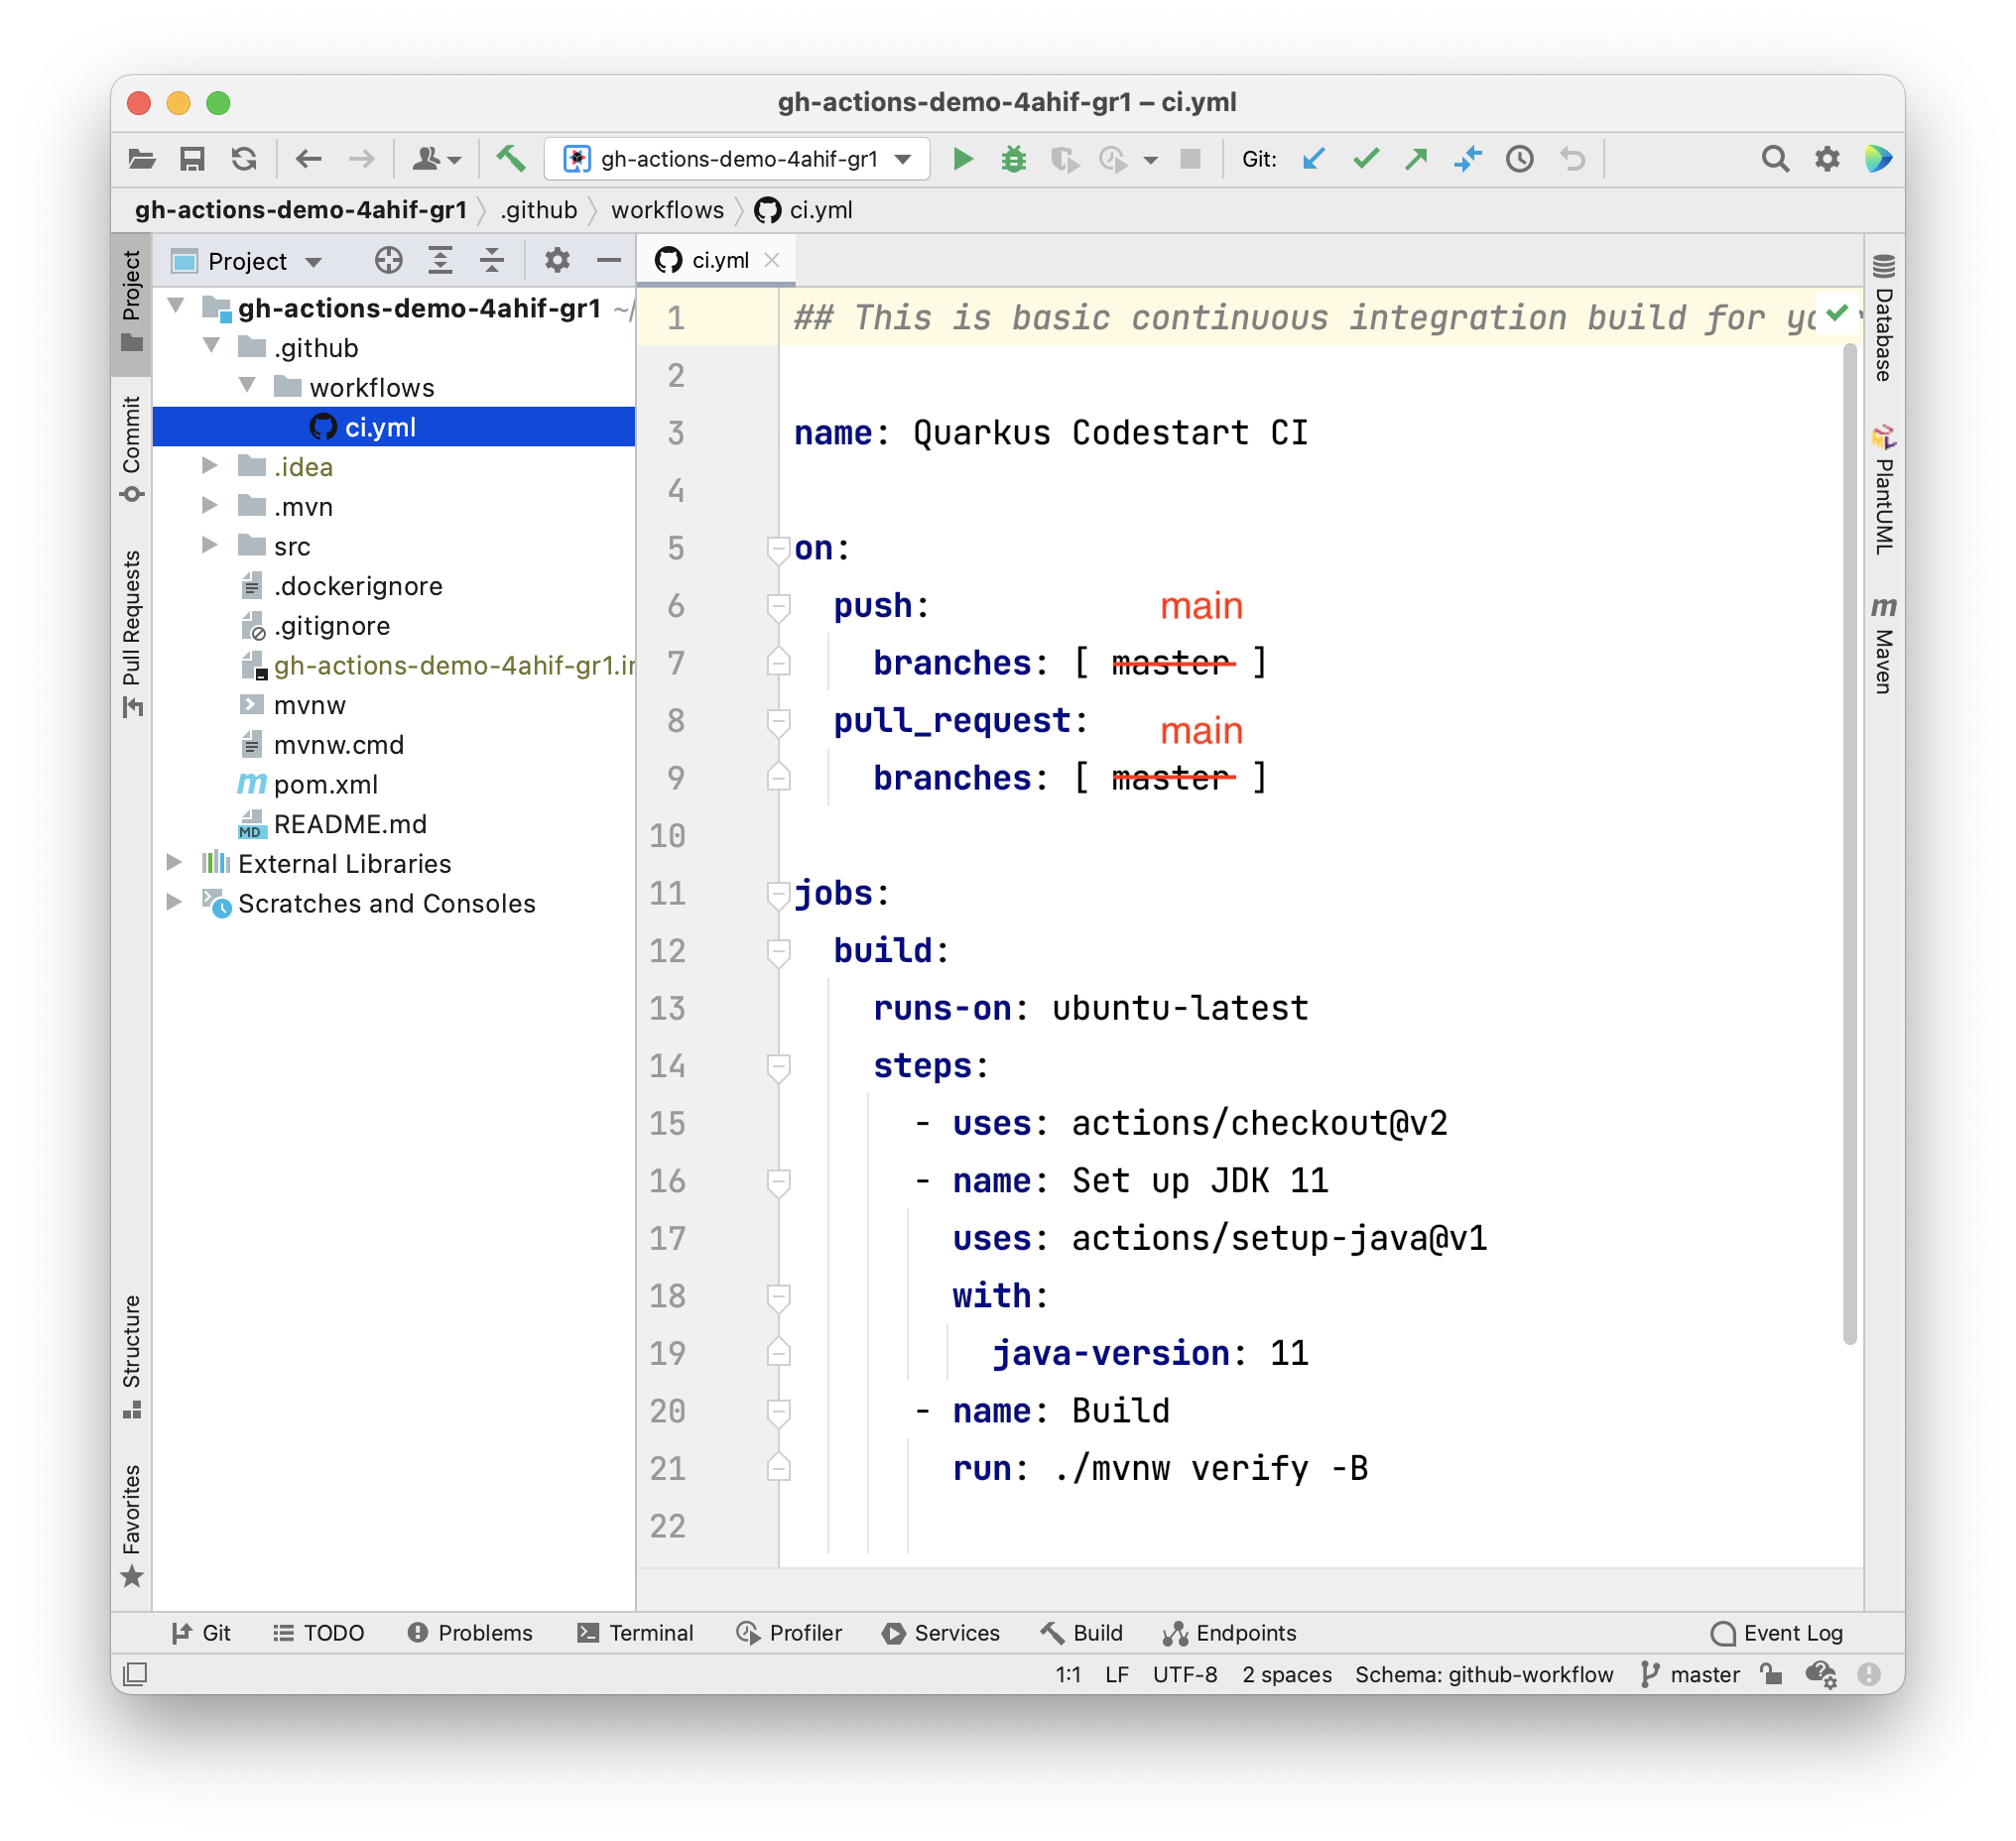
There is already created a ci.yml - file
-
For further infomation → Github Actions
-
Next steps are:
-
create a ssh-key-pair on the remote server for github
-
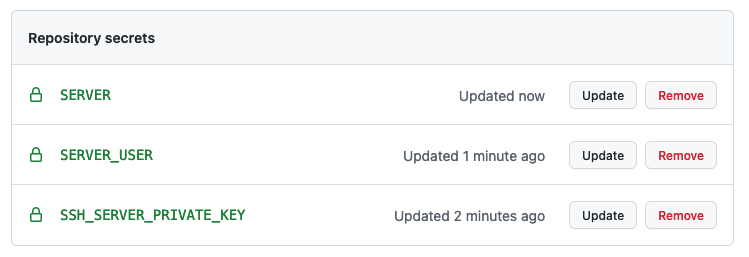
create a secret in the gh-repo, so the remote server can be accessed by the gh-build-server
-
write the pipeline-script (.yml)
-
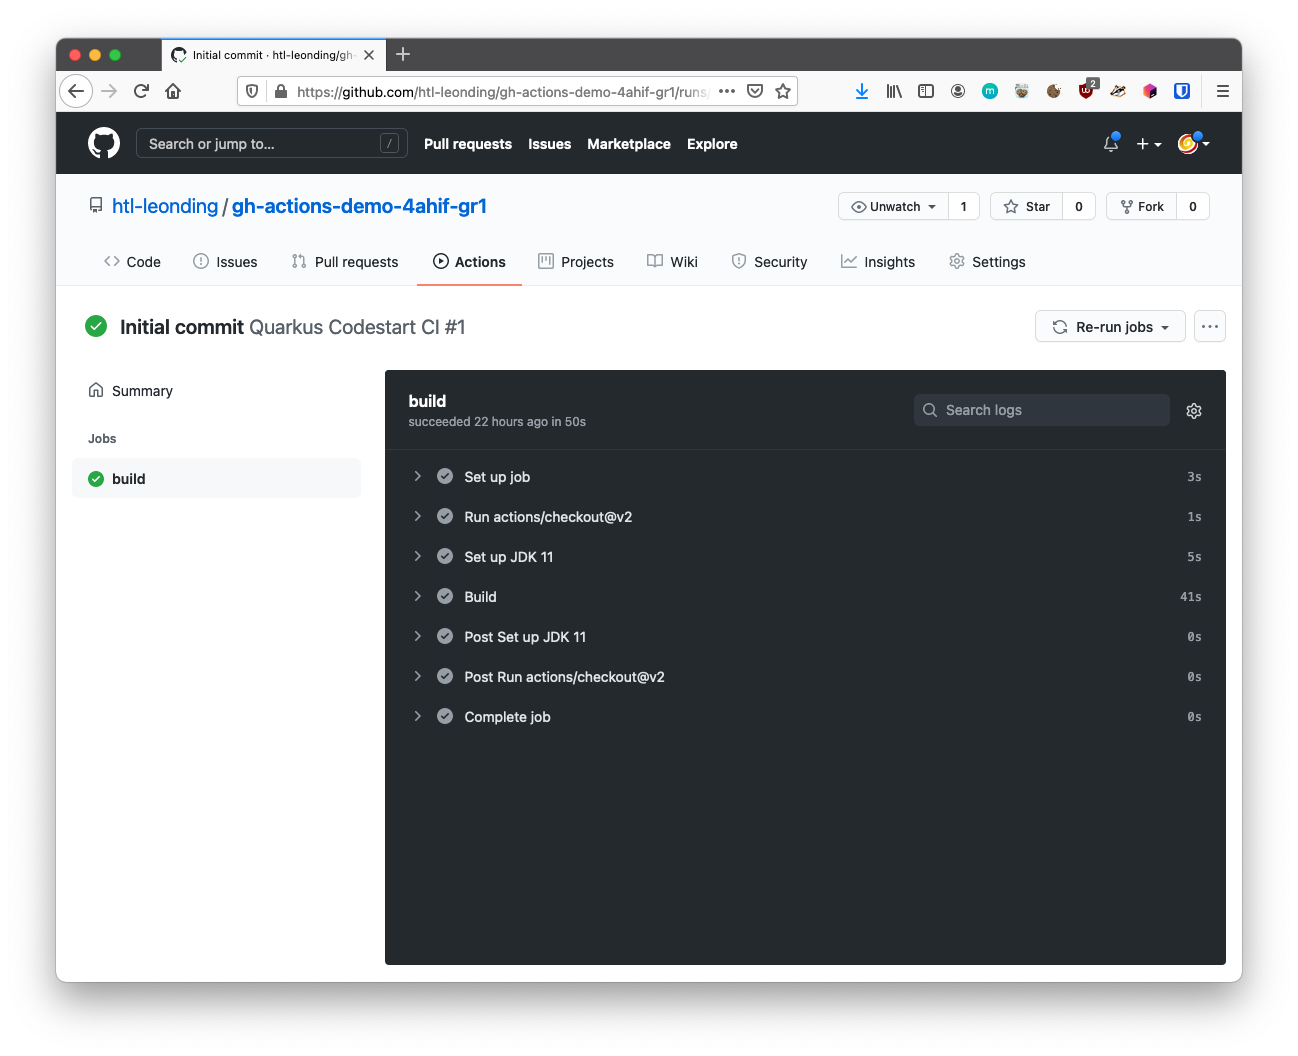
6. Commit, Push and Run the Script
-
There is also a button Re-run jobs, so you don’t have to push, to run the script.
-
Now we have to complete the .yml-file
7. ci.yml - the complete script
Details
## This is basic continuous integration build for your Quarkus application.

name: Quarkus Codestart CI

on:
  push:
    branches: [ main ]
  pull_request:
    branches: [ main ]

jobs:
  build:
    runs-on: ubuntu-latest
    steps:
      - uses: actions/checkout@v2
      - name: Set up JDK 17
        uses: actions/setup-java@v2
        with:
          distribution: 'temurin'
          java-version: '17'
      - name: Build
        run: ./mvnw clean package -Dquarkus.package.type=uber-jar -B
      - name: install ssh key
        uses: webfactory/ssh-agent@v0.5.3
        with:
          ssh-private-key: ${{ secrets.SSH_SERVER_PRIVATE_KEY }}
      - name: create .ssh/known_hosts
        run: |
          ssh-keyscan -H -t rsa -v ${{ secrets.SERVER }}  >> ~/.ssh/known_hosts
      - name: copy binaries to oravm
        run: |
          echo "Hallo ich bin hier"
          ls -l target/
          scp target/gh-actions-demo-1.0.0-SNAPSHOT-runner.jar ${{ secrets.SERVER_USER }}@${{ secrets.SERVER }}:
8. Structure of the Pipeline .yaml-File
8.1. Trigger to Start the gh-action-script
on:
  push:
    branches: [ main ]
  pull_request:
branches: [ main ]-
After a push or an accepted pull request, the script will be started.
| The master branch should be renamed → ie main |
8.4. Install JDK17
      - name: Set up JDK 17
        uses: actions/setup-java@v2
        with:
          distribution: 'temurin'
java-version: '17'-
You can choose, which version you install
8.5. Build the jar File
      - name: Build
run: ./mvnw clean package -Dquarkus.package.type=uber-jar -B-
-B … batch mode
8.6. Install ssh-key into .ssh-Folder
      - name: install ssh key
        uses: webfactory/ssh-agent@v0.5.3
        with:
ssh-private-key: ${{ secrets.SSH_SERVER_PRIVATE_KEY }} (1)| 1 | Here you have to input the created secret SSH_SERVER_PRIVATE_KEY |
9. Commit, Push and Run the Script
ls -lah
total 11M
-rw-r--r-- 1 ubuntu ubuntu  11M Mar 17 11:52 gh-actions-demo-1.0.0-SNAPSHOT-runner.jar
-rw------- 1 ubuntu ubuntu 2.6K Mar 16 13:52 github_key
-rw-r--r-- 1 ubuntu ubuntu  583 Mar 16 13:52 github_key.pub
java -jar gh-actions-demo-1.0.0-SNAPSHOT-runner.jar
curl localhost:8080/hello
10. Create an Ingress Rule for Accessing your Endpoint
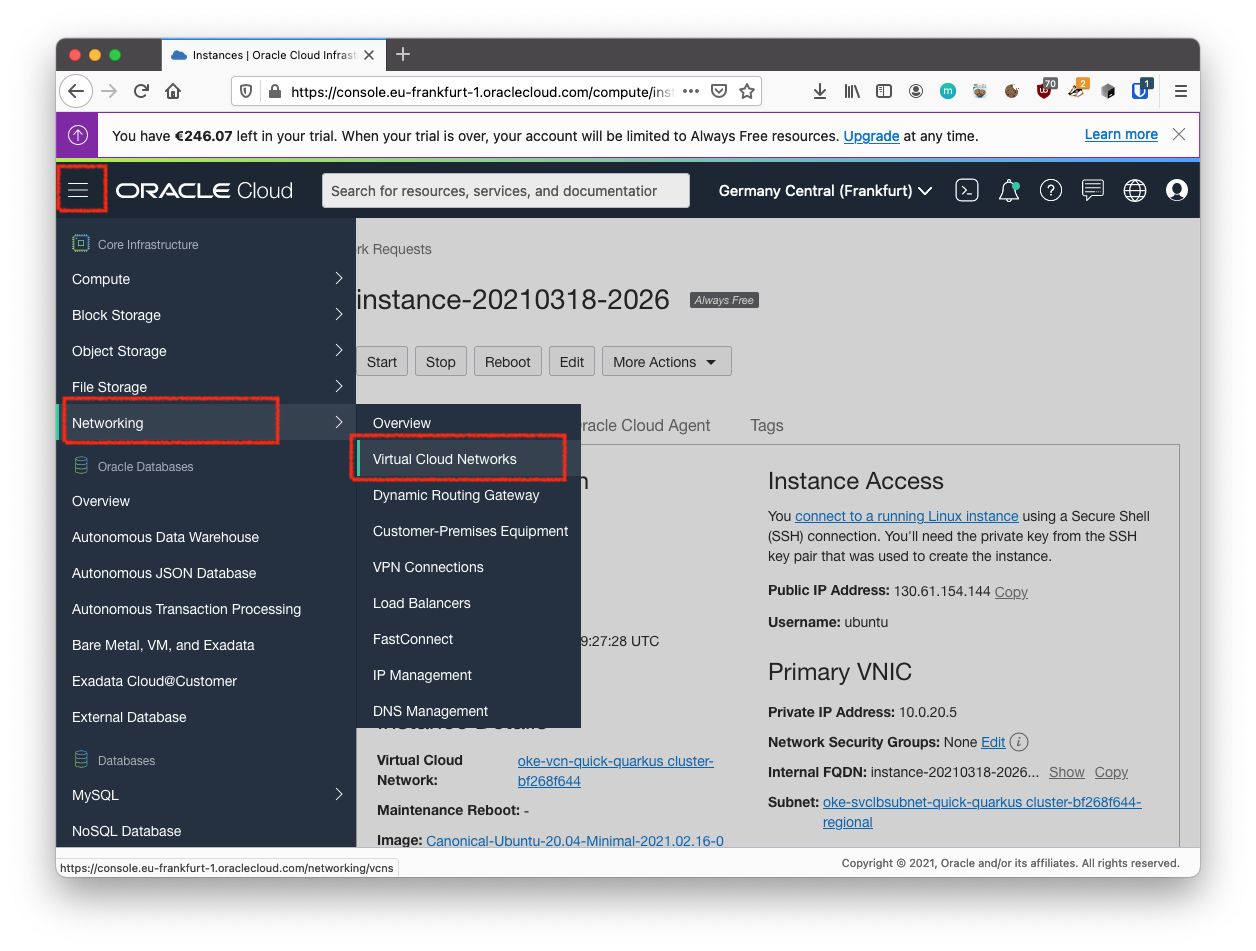
Follow these steps to select your VCN’s public subnet and add the ingress rule.
-
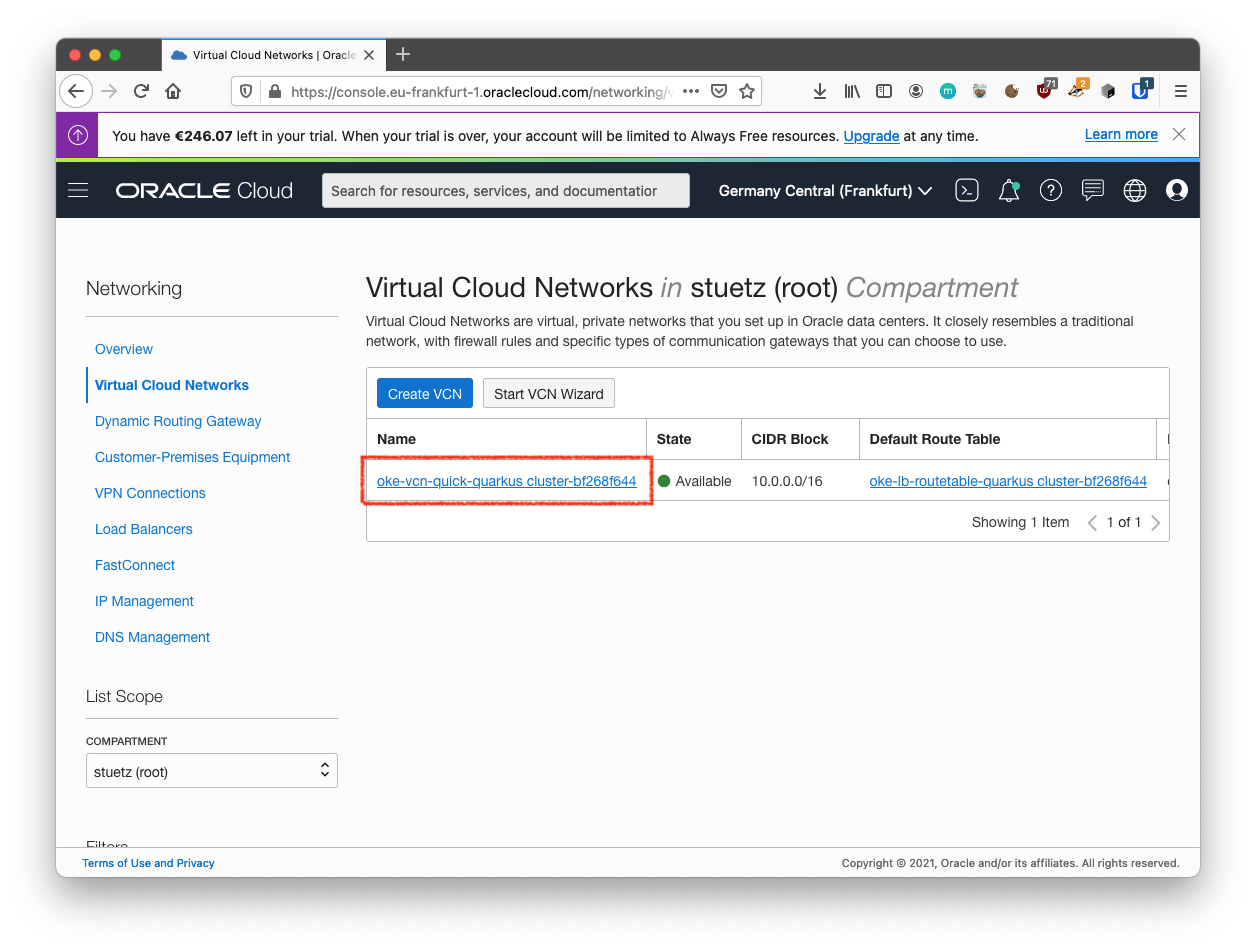
From the main menu, select Networking then select Virtual Cloud Networks.
Details
-
Select the VCN you created with your compute instance.
Details
-
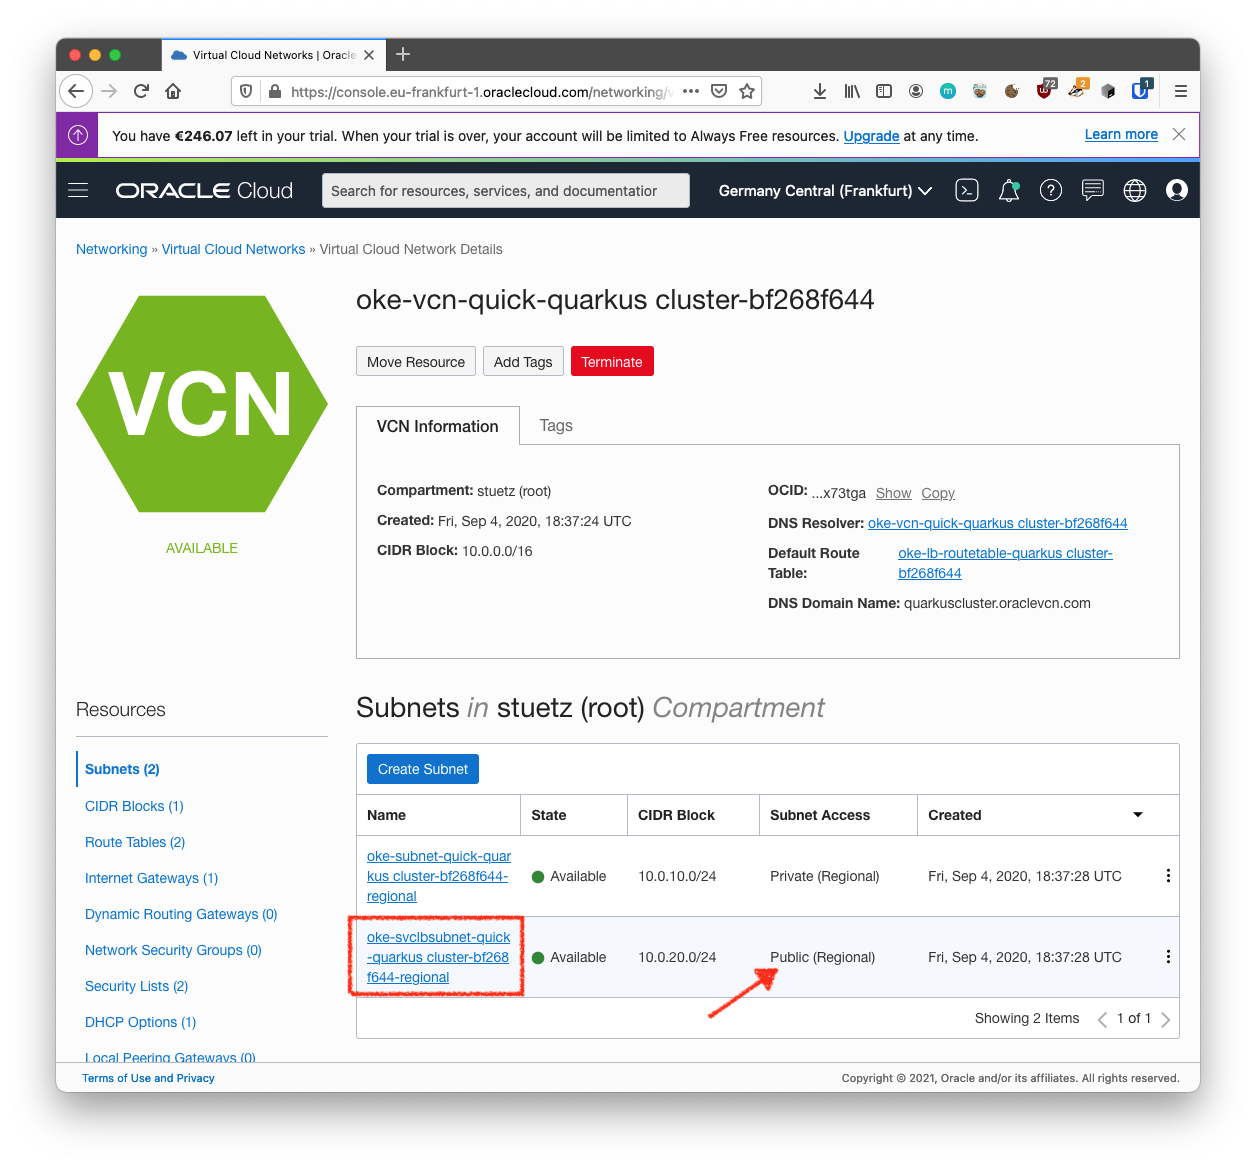
With your new VCN displayed, click <your-subnet-name> subnet link.
The public subnet information is displayed with the Security Lists at the bottom of the page. A link to the Default Security List for your VCN is displayed.
Details
-
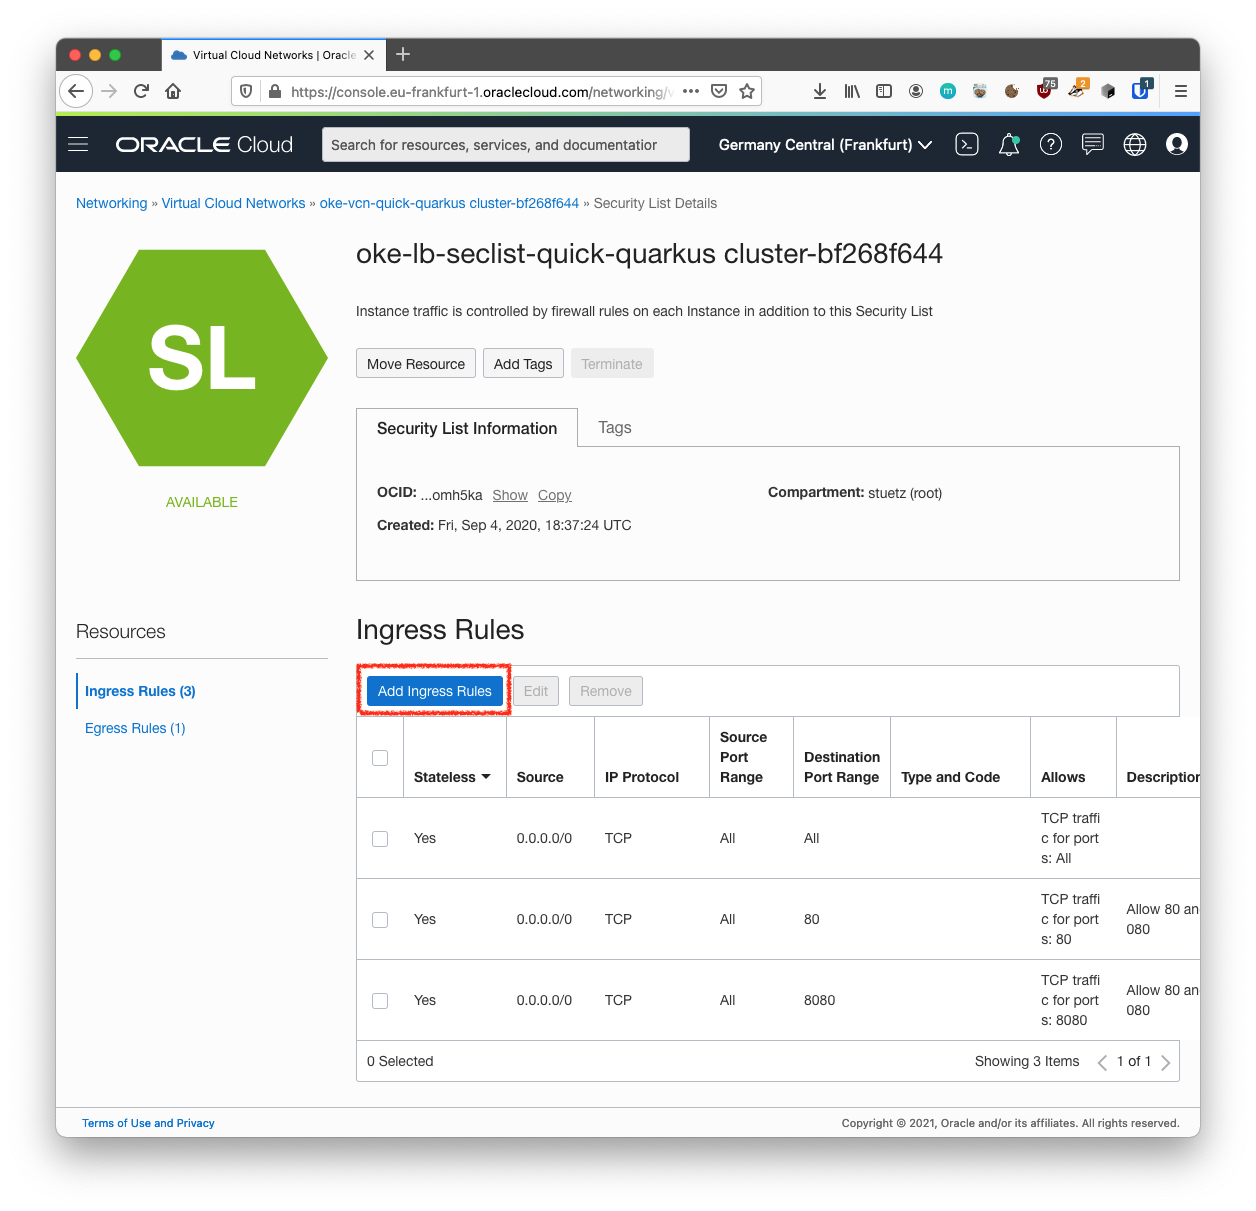
Click the Default Security List link.
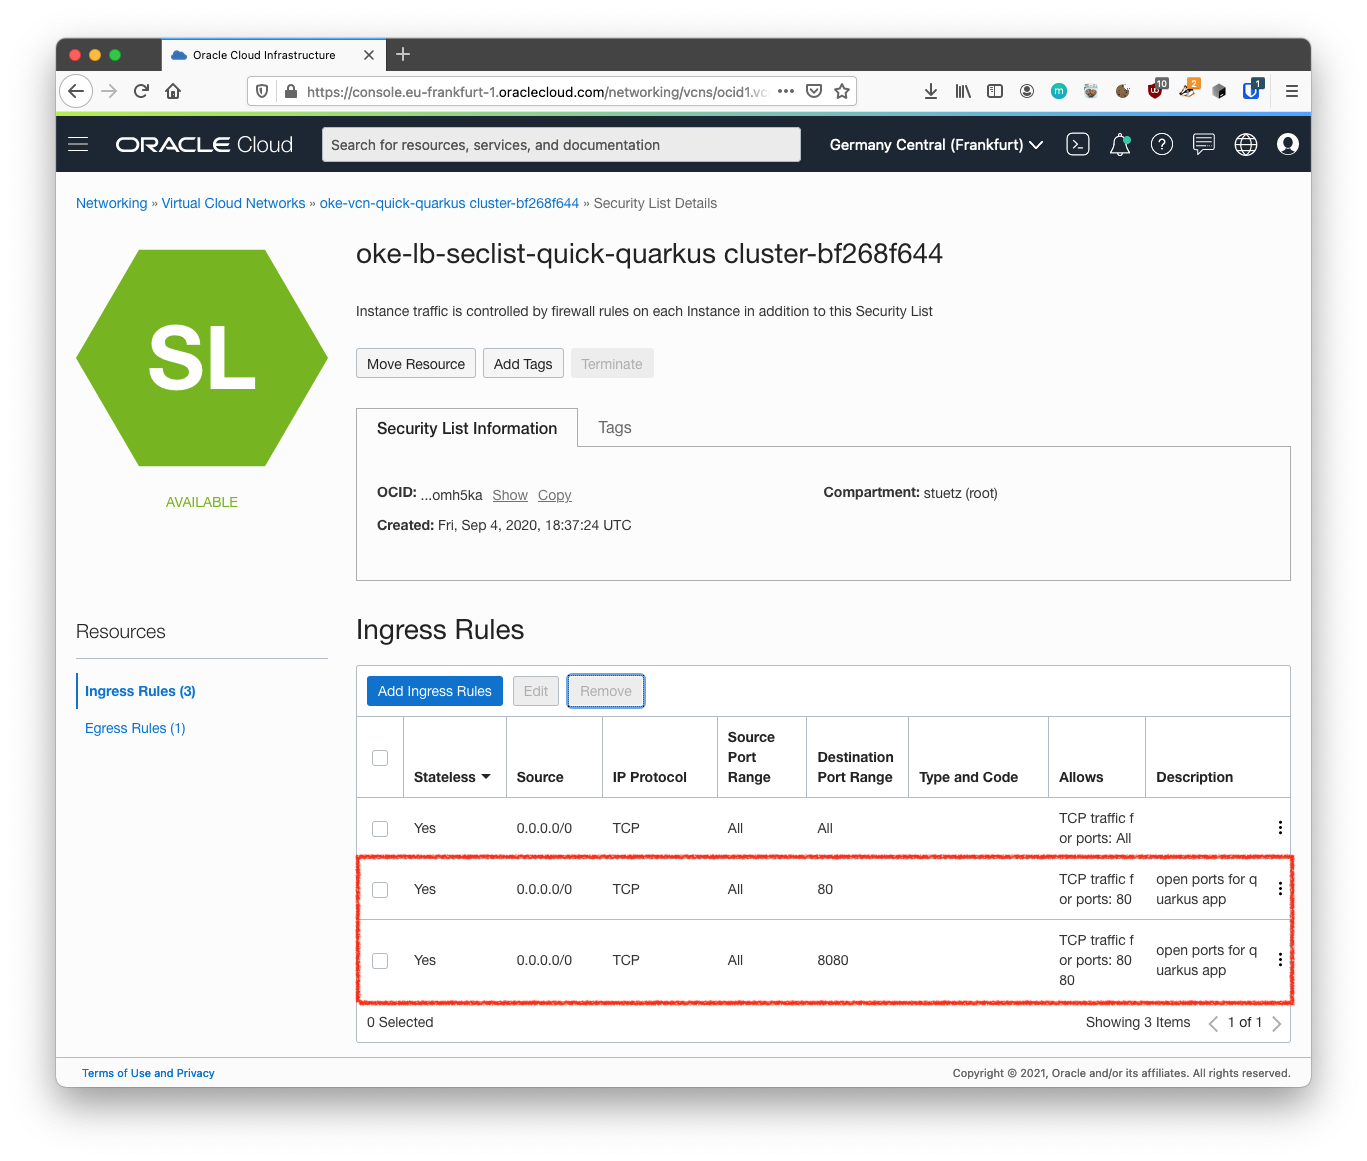
The default Ingress Rules for your VCN are displayed.
Details

-
Click Add Ingress Rules.
Details
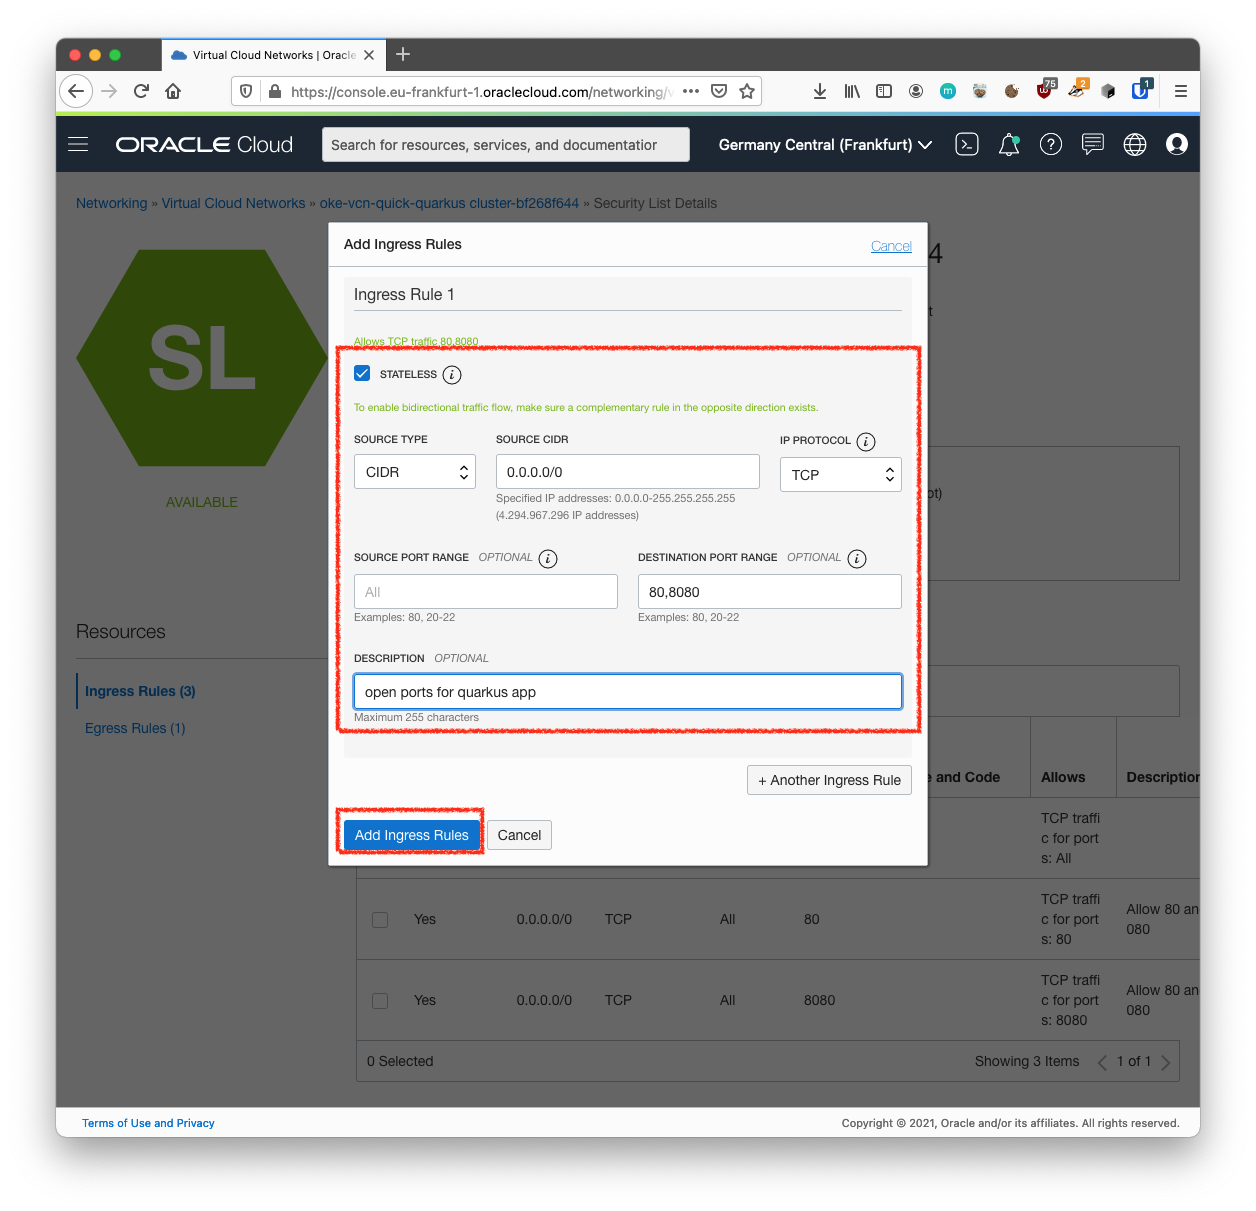
An Add Ingress Rules dialog is displayed.
Details
-
Fill in the ingress rule with the following information.
Fill in the ingress rule as follows:
-
Stateless: Checked
-
Source Type: CIDR
-
Source CIDR: 0.0.0.0/0
-
IP Protocol: TCP
-
Source port range: (leave-blank)
-
Destination Port Range: 8080
-
Description: Allow HTTP connections
-
-
Click Add Ingress Rule.
Details
-
Now HTTP connections are allowed. Your VCN is configured for Quarkus.
-
The next step is to update the firewall settings for ubuntu
-
11. Update Firewall Settings
The Ubuntu firewall is disabled by default. However, it is still necessary to update your iptables configuration to allow HTTP traffic. Execute the following commands to update iptables.
sudo iptables -I INPUT 6 -m state --state NEW -p tcp --dport 8080 -j ACCEPT
sudo netfilter-persistent save